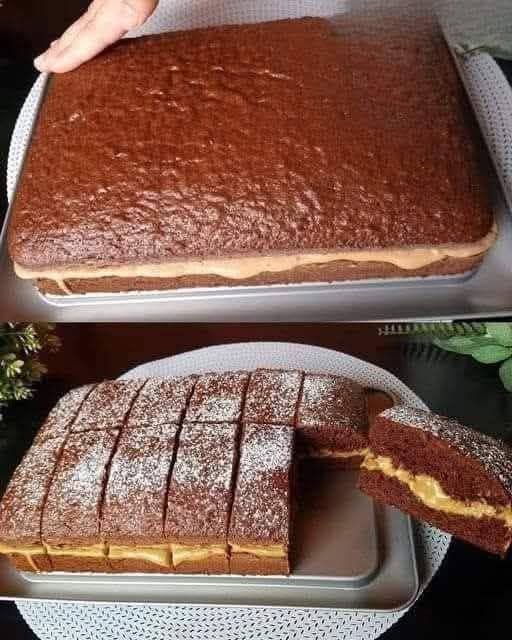

🍫 Layered Chocolate Sponge Cake
Makes: 8–10 servings
Cake: 3 layers, 8-inch (20 cm)
Preparation: 30–40 minutes
Baking: 25–30 minutes
Total: About 2 hours including cooling and decorating
1. Chocolate Sponge
Ingredients
- 1½ cups (190 g) all-purpose flour
- ½ cup (50 g) unsweetened cocoa powder
- 1½ cups (300 g) granulated sugar
- 1½ tsp baking powder
- 1½ tsp baking soda
- ½ tsp salt
- 2 large eggs, room temperature
- ¾ cup (180 ml) milk
- ½ cup (120 ml) neutral oil
- 2 tsp vanilla extract
- ¾ cup (180 ml) hot water or hot coffee
Why coffee? It doesn’t make the cake taste strongly like coffee; it intensifies the chocolate flavor.
2. Chocolate Cream Filling
- 2 cups (480 ml) cold whipping cream
- ½ cup (60 g) powdered sugar
- ¼ cup (25 g) cocoa powder
- 1 tsp vanilla
- 100 g melted dark or semi-sweet chocolate, cooled but still fluid
3. Chocolate Ganache for the Outside
- 200 g dark or semi-sweet chocolate, finely chopped
- 200 ml heavy/whipping cream
- 1 tbsp butter, optional, for extra shine
👩🍳 Step 1 — Prepare the Cake Pans
- Preheat your oven to 175°C / 350°F.
- Grease three 8-inch cake pans.
- Line the bottoms with baking paper.
- Dust lightly with cocoa powder or flour.
If you only have one pan, bake the batter in batches rather than leaving the prepared batter sitting around for a long time.
🍫 Step 2 — Make the Chocolate Batter
- Sift together:
- flour
- cocoa powder
- baking powder
- baking soda
- salt.
- In a large bowl, whisk the eggs and sugar for about 1–2 minutes.
- Add the milk, oil and vanilla. Whisk until combined.
- Add the dry ingredients gradually.
- Mix just until you no longer see dry flour.
- Slowly pour in the hot water or coffee while whisking gently.
The batter will be quite thin. That’s completely normal for this style of chocolate sponge.
Don’t overmix. Excessive mixing can make the cake less tender.
🔥 Step 3 — Bake
Divide the batter evenly between the three pans.
Bake for approximately 22–28 minutes, or until:
- the center springs back when lightly touched;
- a toothpick inserted in the middle comes out with a few moist crumbs;
- the cake has begun pulling slightly away from the sides.
Don’t overbake it. Chocolate cakes can look dry on the outside even while still needing a little time inside, so use the toothpick test.
Let the cakes cool in their pans for 10 minutes, then turn them onto a wire rack.
Allow them to cool completely before filling.
🍰 Step 4 — Make the Chocolate Filling
- Whip the cold cream until it begins to thicken.
- Add powdered sugar, cocoa powder and vanilla.
- Continue whipping until you have medium-stiff peaks.
- Fold in the cooled melted chocolate.
Don’t add hot chocolate directly to the cream or it can melt the cream and make the filling runny.
For a firmer filling
If you’re making the cake in warm weather, refrigerate the filling for 15–20 minutes before assembling.
🔪 Step 5 — Level the Cake
If the tops of the sponges have domed:
- Place each cake on a flat surface.
- Use a long serrated knife.
- Carefully cut off the dome.
- Try to make each layer the same thickness.
Save the scraps — they’re excellent for making chocolate cake truffles or decorating the finished cake.
🥛 Step 6 — Optional Chocolate Soaking Syrup
This makes the cake particularly moist.
Mix:
- ½ cup water
- ¼ cup sugar
- 1 tbsp cocoa powder
Bring to a brief boil, stirring until the sugar dissolves. Cool completely.
You can also add 1 tsp vanilla.
Brush a small amount over each sponge layer.
Don’t soak excessively — the cake should be moist, not wet.
🎂 Step 7 — Assemble the Layers
Place the first sponge on your cake board or serving plate.
Spread a layer of chocolate cream over it.
Place the second sponge on top.
Add another layer of cream.
Place the final sponge on top, with the flat side facing upward.
Press very gently to level the cake.
Now refrigerate the assembled cake for about 20–30 minutes.
This makes decorating much easier.
🍫 Step 8 — Make the Ganache
- Heat the cream until it is hot and steaming, but don’t let it aggressively boil.
- Pour it over the chopped chocolate.
- Leave it undisturbed for about 2 minutes.
- Stir slowly from the center outward until completely smooth.
- Add butter if desired.
- Let the ganache cool until it reaches a spreadable consistency.
Important
If the ganache is:
- Too runny: let it cool longer.
- Too thick: gently warm it.
- Lumpy: place the bowl over very gentle heat and stir.
- Separated/oily: slowly whisk in a small amount of warm cream.
🎨 Step 9 — Decorate
Cover the chilled cake with a thin layer of ganache first — this is your crumb coat.
Refrigerate for 15–20 minutes.
Then apply the final layer of ganache.
For a classic finish, use a palette knife to create smooth sides and a slightly textured top.
You can finish it with:
- chocolate curls
- chocolate shavings
- cocoa powder
- chocolate chips
- fresh strawberries
- chocolate drip
- whipped cream rosettes
- crushed chocolate biscuits.
⭐ Professional Layering Formula
For a particularly impressive cake, use this order:
Chocolate sponge
↓
Light chocolate syrup
↓
Chocolate cream
↓
Chocolate sponge
↓
Light chocolate syrup
↓
Chocolate cream
↓
Chocolate sponge
↓
Thin ganache crumb coat
↓
Final ganache coating
↓
Chocolate decorations
That combination gives you soft sponge + moist center + creamy filling + rich chocolate exterior.
🧊 Storage
Keep the finished cake refrigerated in an airtight cake container.
For the best texture, take it out of the refrigerator about 20–30 minutes before serving.
It generally keeps well for 3–4 days refrigerated, provided the ingredients used are fresh and properly stored.
💡 My biggest tips for getting it right
- Use a scale if possible; baking by weight is much more consistent.
- Use good-quality unsweetened cocoa powder.
- Don’t overbake the sponge.
- Don’t assemble until the cake is completely cool.
- Keep the cream cold while whipping.
- Let melted chocolate cool before adding it to whipped cream.
- Chill between decorating stages.
- For a very moist cake, use the soaking syrup—but use it sparingly.
- For the cleanest slices, refrigerate the completed cake for several hours before cutting.
If you want, I can also give you a bakery-style version with exact measurements for a 1 kg, 2 kg, or 3 kg chocolate cake, including cream quantity, filling, ganache, decoration, and costing.