
Gluten-Free Pizza Crust
Prep time: 15 minutes
Rise time: 45–60 minutes
Bake time: 20–25 minutes
Total time: About 1½ hours
Makes: 1 large 12-inch crust
This gluten-free pizza crust is crisp around the edges, tender in the center, and sturdy enough to hold plenty of sauce and toppings. It uses a gluten-free flour blend plus a little psyllium husk to give the crust better flexibility and structure.
Ingredients
- 2 cups (280 g) gluten-free all-purpose flour blend
- 1 tbsp psyllium husk powder
- 1 tsp instant yeast
- 1 tsp sugar or honey
- ¾ tsp salt
- 1 cup (240 ml) warm water
- 2 tbsp olive oil
- 1 tsp apple cider vinegar
- 1 large egg, room temperature
For the pan
- 1 tbsp olive oil
- Gluten-free cornmeal or rice flour, optional
Instructions
1. Activate the yeast
In a small bowl, combine the warm water, sugar, and yeast.
Let it stand for approximately 5 minutes.
It should become slightly foamy.
If using instant yeast, you can also mix it directly with the dry ingredients, but blooming it first is a useful way to check that the yeast is active.
2. Combine the dry ingredients
In a large bowl, whisk together the gluten-free flour, psyllium husk, and salt.
Mix thoroughly so the psyllium is evenly distributed.
3. Add the wet ingredients
Add the yeast mixture, olive oil, apple cider vinegar, and egg.
Stir with a sturdy spoon or spatula for approximately 2–3 minutes.
Unlike traditional pizza dough, gluten-free dough will be soft, sticky, and more like a thick paste.
Don’t add large amounts of flour to make it kneadable.
4. Rest the dough
Cover the bowl with a clean towel or plastic wrap.
Let it rest in a warm place for approximately 45–60 minutes.
It should become slightly puffy.
It won’t necessarily double in size like traditional wheat dough.
Shape the Crust
5. Prepare the pan
Preheat the oven to 450°F (230°C).
Lightly grease a pizza pan or baking sheet with olive oil.
Sprinkle with gluten-free cornmeal or rice flour if desired.
6. Transfer the dough
Scrape the dough onto the center of the prepared pan.
Lightly oil your hands.
Place a sheet of parchment paper over the dough and gently press it outward into a 12-inch circle.
Aim for approximately ¼-inch (6 mm) thickness in the center.
Make the edges slightly thicker to create a crust rim.
7. Rest briefly
Let the shaped crust rest for another 10 minutes while the oven finishes heating.
Par-Bake
8. Bake the crust
Place the crust in the oven and bake for approximately 10–12 minutes.
The surface should look dry and the edges should just begin to turn golden.
Par-baking is particularly helpful for gluten-free pizza because it prevents the center from becoming soggy once sauce and toppings are added.
9. Add toppings
Remove the crust from the oven.
Add:
- Pizza sauce
- Mozzarella
- Your favorite toppings
- Italian seasoning or oregano
Don’t overload the pizza.
Too many wet toppings can make the center soft.
10. Finish baking
Return the pizza to the oven.
Bake for another 8–12 minutes, until the cheese is bubbling and the edges are golden brown.
For a crispier bottom, place the pizza directly on a preheated pizza stone or steel for the final few minutes if your setup allows.
11. Cool briefly
Allow the pizza to rest for 5 minutes before slicing.
This gives the crust time to firm up.
Crispy Crust Version
For a particularly crisp gluten-free crust:
- Use a metal pizza pan rather than glass.
- Preheat the pan in the oven.
- Brush the edges with olive oil.
- Keep the crust relatively thin.
- Par-bake before adding toppings.
- Don’t use excessive sauce.
You can also bake the par-baked crust directly on a preheated pizza stone.
Cheesy Garlic Crust
Before the final bake, brush the crust edges with:
- 1 tbsp melted butter or olive oil
- ¼ tsp garlic powder
- 1 tbsp grated Parmesan
- Pinch of Italian seasoning
Bake until golden.
Gluten-Free Margherita Pizza
Top the par-baked crust with:
- ½ cup pizza sauce
- 1½ cups fresh or shredded mozzarella
- Sliced tomatoes
- Fresh basil
- 1 tbsp Parmesan
- Olive oil
Bake until the cheese is bubbling, then add fresh basil after baking.
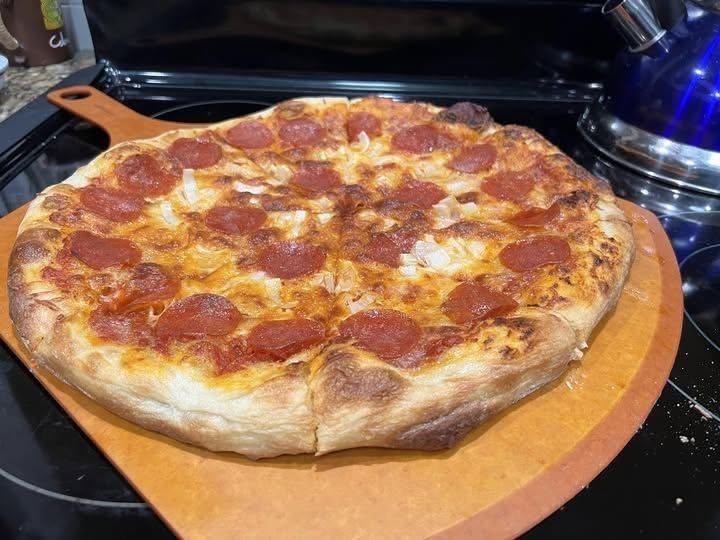
Gluten-Free Pepperoni Pizza
Use:
- Pizza sauce
- Mozzarella
- Pepperoni
- Parmesan
- Oregano
- Red pepper flakes, optional
For crispier pepperoni, place some slices directly on top of the cheese.
Tips for Success
Use a gluten-free flour blend designed for baking
A blend containing ingredients such as rice flour, tapioca starch, or potato starch generally works better than using a single gluten-free flour.
If your blend already contains xanthan gum, you generally don’t need to add more.
Don’t knead the dough
There’s no gluten to develop.
Simply mix until the ingredients are thoroughly combined.
Don’t expect traditional dough
Gluten-free pizza dough is naturally softer and stickier.
The parchment-paper method makes shaping it much easier.
Psyllium helps
Psyllium husk improves the dough’s structure and flexibility.
If your gluten-free flour blend already contains a significant amount of psyllium, you may need less additional psyllium.
Check every ingredient
If you need the pizza to be strictly gluten-free because of celiac disease or an allergy, verify that your flour blend, yeast, toppings, sauces, and seasonings are certified or labeled gluten-free and avoid cross-contact with wheat-containing surfaces and utensils.
Make-Ahead Instructions
You can par-bake the crust, allow it to cool completely, and refrigerate it for up to 3 days.
When ready to use, add your toppings and bake at 450°F (230°C) for approximately 8–12 minutes.
Freezing
After par-baking, allow the crust to cool completely.
Wrap it tightly in plastic wrap followed by foil, then freeze for up to 2 months.
You can add toppings while the crust is still frozen and bake directly from frozen, adding a few extra minutes if necessary.
Best Result
For a crisp, sturdy gluten-free pizza, par-bake the crust first, use a moderate amount of sauce, don’t overload it with wet toppings, and finish on a very hot baking surface. This gives you golden edges and a much firmer center without the gummy texture that can occur with gluten-free pizza.