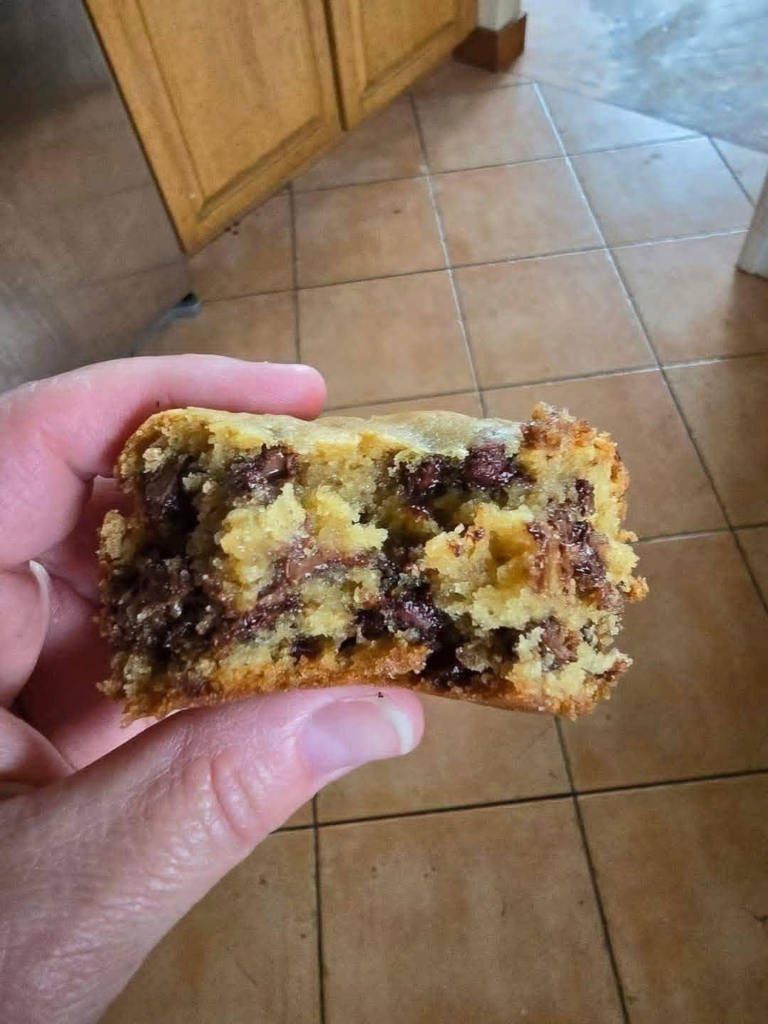

🍪🍫 Sourdough Chocolate Chip Cookie Bars
These thick, chewy sourdough chocolate chip cookie bars are buttery, soft in the center, golden around the edges, and loaded with chocolate chips. Sourdough discard adds a subtle tang that balances the sweetness and gives the bars an especially rich flavor.
Perfect for using up sourdough discard without making another loaf!
🍪 Recipe at a Glance
- Yield: 16–24 bars
- Prep time: 15 minutes
- Chill time: 30 minutes–1 hour
- Bake time: 25–32 minutes
- Total time: About 1½ hours
- Pan: 9 × 13-inch (23 × 33 cm)
- Oven: 350°F (175°C)
🛒 Ingredients
For the Cookie Bars
- 1 cup (226 g) unsalted butter, melted and slightly cooled
- 1 cup (200 g) packed brown sugar
- ½ cup (100 g) granulated sugar
- ½ cup (120 g) sourdough discard, 100% hydration
- 2 large eggs
- 2 teaspoons vanilla extract
- 2¾ cups (345 g) all-purpose flour
- 1 teaspoon baking soda
- 1 teaspoon salt
- 2 cups (340 g) semisweet or milk chocolate chips
- ½ cup (85 g) chopped chocolate, optional, for extra chocolatey pockets
Optional Finishing Ingredients
- Flaky sea salt
- Extra chocolate chips
- Chopped walnuts or pecans
🧈 Step 1: Prepare the Pan
Preheat your oven to:
350°F (175°C)
Line a 9 × 13-inch baking pan with parchment paper.
Leave some parchment hanging over two sides of the pan. This will make it much easier to lift the finished cookie bars out.
Lightly grease the parchment with butter or cooking spray.
🧈 Step 2: Melt the Butter
Melt 1 cup of butter in a saucepan or microwave.
Allow it to cool for several minutes.
You want the butter to be melted but not piping hot.
If it’s too hot when you add the eggs, it can partially cook them.
🍯 Step 3: Combine the Sugars and Butter
Pour the melted butter into a large mixing bowl.
Add:
- 1 cup brown sugar
- ½ cup granulated sugar
Whisk for approximately 1–2 minutes until well combined.
The mixture should look glossy and smooth.
The brown sugar provides moisture and a chewy texture, while the granulated sugar helps the edges become lightly crisp.
🥚 Step 4: Add the Wet Ingredients
Add:
- ½ cup sourdough discard
- 2 eggs
- 2 teaspoons vanilla
Whisk until everything is completely combined.
The mixture may look slightly loose and glossy.
That’s normal.
🌾 Step 5: Mix the Dry Ingredients
In a separate bowl, whisk together:
- 2¾ cups all-purpose flour
- 1 teaspoon baking soda
- 1 teaspoon salt
Mix thoroughly.
This helps distribute the baking soda and salt evenly throughout the flour.
🥣 Step 6: Combine Wet and Dry Ingredients
Gradually add the dry ingredients to the wet mixture.
Use a spatula or wooden spoon to mix.
Stir only until the flour is almost completely incorporated.
Don’t overmix.
Overmixing develops gluten and can make your cookie bars tougher rather than soft and chewy.
🍫 Step 7: Add the Chocolate
Fold in:
- 2 cups chocolate chips
- ½ cup chopped chocolate, if using
Reserve a small handful of chocolate chips for the top.
The dough should be thick and soft.
❄️ Step 8: Chill the Dough
Spread the dough evenly into the prepared pan.
For the best texture, cover the pan and refrigerate the dough for approximately 30–60 minutes.
Chilling helps:
- Reduce spreading
- Improve chewiness
- Deepen the flavor
- Give the bars a thicker texture
If you’re in a hurry, you can bake them immediately, but chilled dough generally gives a better result.
🍫 Step 9: Add Extra Chocolate
Before baking, scatter the reserved chocolate chips over the surface.
Gently press them into the dough.
For a bakery-style appearance, use a mixture of chocolate chips and roughly chopped chocolate.
🔥 Step 10: Bake
Place the pan in the preheated oven.
Bake for approximately 25–32 minutes.
Start checking around the 25-minute mark.
The cookie bars are ready when:
- The edges are golden brown
- The top looks set
- The center is slightly soft
- A toothpick inserted near the center comes out with a few moist crumbs
Don’t overbake them.
The center will continue cooking from residual heat after the pan comes out of the oven.
For extra-chewy bars, take them out when the center still looks slightly underdone.
🧂 Step 11: Add Flaky Salt
If desired, immediately sprinkle the hot cookie bars with a little flaky sea salt.
The salty-sweet combination is fantastic with the chocolate.
Don’t use a lot—just a light sprinkle is enough.
❄️ Step 12: Cool Completely
Let the cookie bars cool in the pan for at least 30–45 minutes.
For the cleanest slices, allow them to cool completely.
Once cool, lift the entire slab out using the parchment paper.
Place it on a cutting board and cut into:
- 16 large bars
- 20 medium bars
- 24 smaller squares
🍫 For Extra Gooey Cookie Bars
If you want extremely gooey centers:
- Use chopped chocolate rather than only chocolate chips.
- Chill the dough before baking.
- Slightly underbake the bars.
- Allow them to cool before cutting.
The chocolate will remain soft and melty in the center.
🥜 Add Nuts
For a classic chocolate-chip-cookie flavor, fold in:
½–¾ cup chopped walnuts or pecans
Walnuts give a slightly earthy flavor, while pecans provide a sweeter, buttery crunch.
You can also toast the nuts first for an even deeper flavor.
🍪 Brown Butter Version
For an even more flavorful cookie bar, brown the butter before using it.
Place the butter in a saucepan over medium heat.
Cook, stirring frequently, until:
- The butter melts
- It begins to foam
- Golden-brown bits appear at the bottom
- It smells nutty and toasted
Immediately remove it from the heat and let it cool before continuing with the recipe.
Brown butter + sourdough discard + chocolate makes an especially delicious combination.
🍯 What Type of Sourdough Discard?
This recipe works best with 100% hydration sourdough discard.
You can use discard that has been sitting in the refrigerator for several days, provided it looks and smells normal.
A mild discard produces a subtle tang.
A very acidic discard will give the cookie bars a more noticeable sourdough flavor.
👩🍳 Important Tips
Measure flour carefully
Too much flour can make the bars dry.
For the most accurate results, weigh the flour with a kitchen scale.
Don’t overmix
Mix until the flour disappears, then stop.
Don’t overbake
The center should still be somewhat soft when you remove the pan from the oven.
Cool before slicing
Warm cookie bars are extremely soft and can fall apart when cut.
Use parchment paper
It makes removing the entire batch dramatically easier.
🧊 Storage
Store the cooled bars in an airtight container at room temperature.
They should stay soft for approximately 4–5 days.
For an extra-soft texture, place a small piece of bread in the container. The bread helps maintain moisture.
❄️ Freezing
These bars freeze very well.
Freeze individual bars
Cut the cooled cookie slab into individual portions.
Wrap each bar tightly in plastic wrap or place them in a freezer-safe container.
Freeze for up to 3 months.
Thaw at room temperature.
Freeze the entire slab
You can also wrap the uncut slab tightly and freeze it.
Thaw completely before slicing.
🔥 Reheating
For that fresh-from-the-oven experience, microwave an individual cookie bar for approximately:
10–15 seconds
The chocolate will become soft and gooey again.
Serve with a scoop of vanilla ice cream for an incredible dessert.
🍨 Serving Ideas
These cookie bars are fantastic on their own, but you can make them even more indulgent.
Classic
Warm bar + cold glass of milk
Dessert
Warm bar + vanilla ice cream + chocolate sauce
Salted Chocolate
Warm bar + flaky sea salt
S’mores
Warm bar + toasted marshmallow + chocolate drizzle
Sundae
Cookie bar + ice cream + caramel + chopped pecans
⭐ Final Result
You’ll get thick, chewy, buttery cookie bars with crisp golden edges, soft centers, loads of melted chocolate, and a subtle sourdough tang.
The combination of brown sugar, sourdough discard, vanilla, and chocolate makes these taste like an elevated bakery-style chocolate chip cookie—but they’re much easier because you bake the whole batch in one pan. 🍪🍫✨