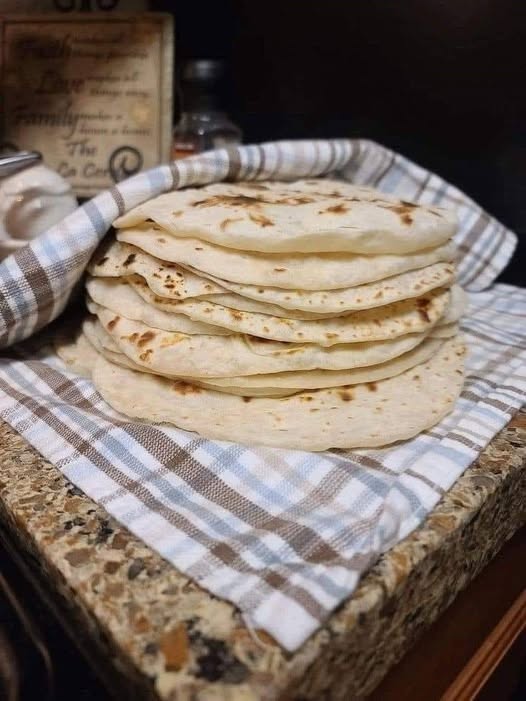

Gluten-Free Flour Tortillas
Soft, flexible homemade gluten-free flour tortillas that are perfect for tacos, wraps, quesadillas, burritos, and more. They use a simple gluten-free flour blend and stay pliable rather than cracking when folded.
🌮 Recipe at a Glance
- Yield: 10 tortillas
- Prep time: 15 minutes
- Rest time: 20 minutes
- Cook time: 15 minutes
- Total time: About 50 minutes
- Difficulty: Easy
🛒 Ingredients
- 2 cups (280 g) gluten-free all-purpose flour blend, preferably one containing xanthan gum
- ½ teaspoon xanthan gum, only if your flour blend doesn’t already contain it
- 1 teaspoon salt
- 1 teaspoon baking powder
- 2 tablespoons olive oil
- ¾ cup (180 ml) warm water, plus more as needed
- 1 teaspoon apple cider vinegar
- 1 tablespoon additional flour, for shaping if needed
Optional for Softer Tortillas
- 1 tablespoon plain Greek yogurt or sour cream
🥣 Step 1: Combine the Dry Ingredients
In a large bowl, whisk together:
- Gluten-free flour
- Xanthan gum, if needed
- Salt
- Baking powder
Mix thoroughly so the leavening and xanthan gum are evenly distributed.
💧 Step 2: Add the Wet Ingredients
Add:
- Olive oil
- Apple cider vinegar
- Warm water
Stir with a sturdy spoon until a soft dough forms.
If the dough seems dry or crumbly, add warm water 1 tablespoon at a time.
If it feels excessively sticky, add a small amount of gluten-free flour.
✋ Step 3: Knead Briefly
Unlike wheat tortillas, gluten-free dough doesn’t need extensive kneading.
Use your hands to gently work the dough for approximately 1–2 minutes, just until smooth.
The dough should feel:
- Soft
- Moist
- Flexible
- Easy to shape
⏰ Step 4: Rest the Dough
Cover the bowl with a clean kitchen towel or plastic wrap.
Let the dough rest for approximately:
20 minutes
This gives the gluten-free flour time to absorb the water.
⚪ Step 5: Divide the Dough
Divide the dough into 10 equal portions.
Roll each portion into a smooth ball.
Keep the dough balls covered while working so they don’t dry out.
🌮 Step 6: Roll the Tortillas
Place one dough ball between two sheets of parchment paper.
Flatten it gently with your hand.
Use a rolling pin to roll it into a thin circle approximately:
6–7 inches (15–18 cm) wide
Try to keep the thickness even.
Don’t roll them too thin.
Very thin gluten-free tortillas can become difficult to handle and may crack.
🔥 Step 7: Heat the Pan
Heat a large dry skillet or cast-iron pan over medium-high heat.
You don’t need to add oil.
The pan should be hot enough that a tortilla begins forming small bubbles within a few seconds.
🌮 Step 8: Cook the Tortilla
Carefully peel away the top parchment.
Place the tortilla onto the hot skillet.
Cook for approximately:
45–60 seconds
You’ll see bubbles forming and small golden spots developing underneath.
🔄 Step 9: Flip
Flip the tortilla carefully.
Cook the second side for another:
30–60 seconds
Don’t overcook it.
The tortilla should remain soft and flexible.
🧺 Step 10: Keep Them Soft
Transfer the cooked tortilla to a clean kitchen towel.
Cover it immediately.
Continue cooking the remaining tortillas and stack them under the towel.
The trapped steam helps keep them soft and pliable.
🧈 Optional: Make Them Extra Soft
For especially soft tortillas, lightly brush each warm tortilla with a tiny amount of melted butter or olive oil.
Stack them and keep covered.
🌮 How to Use Them
These tortillas are great for:
- 🌮 Tacos
- 🌯 Burritos
- 🥙 Wraps
- 🧀 Quesadillas
- 🌯 Breakfast wraps
- 🥬 Chicken wraps
- 🫘 Bean and cheese wraps
🧀 Gluten-Free Quesadillas
Place a cooked tortilla in a skillet.
Add:
- Shredded cheese
- Cooked chicken or beef
- Peppers
- Onions
Top with another tortilla.
Cook over medium heat until golden and the cheese melts.
🌮 Taco-Style Tortillas
For a softer taco tortilla, cook them slightly less.
Keep them covered in a towel as you work.
Warm them again for a few seconds immediately before serving.
🌶️ Herb & Garlic Tortillas
Add to the dough:
- ½ teaspoon garlic powder
- 1 teaspoon dried parsley
- ½ teaspoon dried oregano
These are particularly good with grilled chicken or roasted vegetables.
🌿 Spinach Tortillas
Blend together:
- ½ cup fresh spinach
- ¼ cup of the recipe’s warm water
Strain if necessary, then use the green liquid as part of the water in the dough.
You’ll get naturally green tortillas with a mild spinach flavor.
👩🍳 Tips for Success
Check your flour blend
Some gluten-free flour blends already contain xanthan gum. If yours does, don’t add another ½ teaspoon.
Use warm water
Warm water helps the dough come together and makes it easier to roll.
Don’t let the dough dry out
Keep unused dough balls covered while you work.
Use parchment
Gluten-free dough is much easier to roll between sheets of parchment than directly on a counter.
Don’t overcook
Overcooked gluten-free tortillas become dry and brittle.
Keep cooked tortillas covered
This is one of the easiest ways to keep them flexible.
🧊 Storage
Cool the tortillas completely.
Stack them with pieces of parchment between them and place them in an airtight bag or container.
Refrigerate for up to 4–5 days.
Reheat briefly in a dry skillet or microwave.
❄️ Freezing
These tortillas freeze very well.
Stack them with parchment between each tortilla.
Place them in a freezer-safe bag and freeze for up to 2–3 months.
Thaw at room temperature or warm them directly in a skillet.
⚠️ Gluten-Free Safety
If you’re making these for someone with celiac disease or a strict gluten-free requirement, use certified gluten-free ingredients and avoid cross-contact with wheat flour, cutting boards, utensils, and cooking surfaces.
⭐ Final Result
You’ll have soft, flexible gluten-free tortillas with lightly browned spots and a tender texture, without the cracking and crumbling that can happen with homemade gluten-free wraps.
Keep them warm and covered, then fill them with your favorite taco or wrap ingredients.