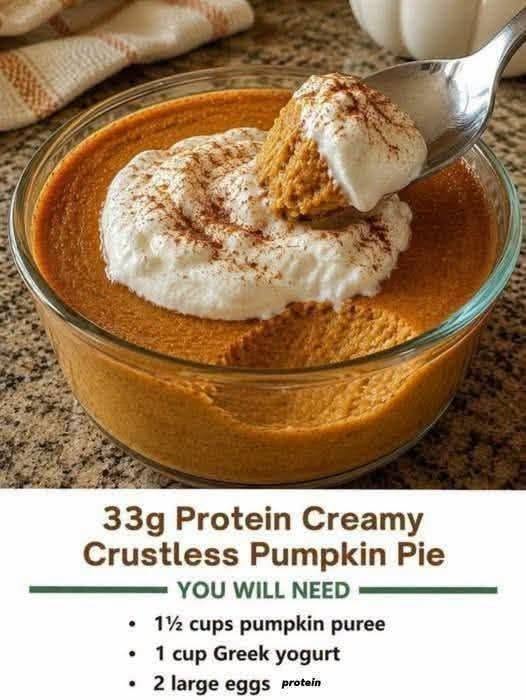

Crustless Pumpkin Pie
This crustless pumpkin pie is creamy, warmly spiced, naturally gluten-free, and wonderfully easy to make. It has all the classic flavor of pumpkin pie without the pastry crust. The center stays silky and custardy while the edges become lightly golden.Serves: 8
Prep time: 15 minutes
Bake time: 50–60 minutes
Cooling time: 2 hours
Total time: About 3 hours
Ingredients
For the pumpkin filling
- 1 can (15 oz / 425 g) pure pumpkin purée
- ¾ cup (150 g) granulated sugar
- ¼ cup (55 g) light brown sugar
- 2 large eggs
- 1 large egg yolk
- 1 cup (240 ml) evaporated milk
- ½ cup (120 ml) heavy cream
- 2 tablespoons melted unsalted butter
- 1½ teaspoons vanilla extract
- 1½ teaspoons ground cinnamon
- ½ teaspoon ground ginger
- ¼ teaspoon ground nutmeg
- ⅛ teaspoon ground cloves
- ½ teaspoon salt
Optional toppings
- Whipped cream
- Ground cinnamon
- Chopped pecans
- Caramel sauce
- Powdered sugar
- A little freshly grated nutmeg
Step 1: Prepare the Oven
Preheat your oven to 175°C / 350°F.
Position an oven rack in the center of the oven.
Lightly grease a 9-inch / 23-cm pie dish with butter or nonstick cooking spray.
Because there is no crust, greasing the dish helps prevent the pumpkin filling from sticking.
Step 2: Prepare the Pumpkin
Place the pumpkin purée in a large mixing bowl.
If your pumpkin purée looks particularly watery, spread it onto a few layers of paper towel and gently blot some moisture from the surface.
You don’t necessarily need to do this with canned pumpkin, but removing a little excess moisture can produce a firmer, richer pie.
Make sure you’re using pure pumpkin purée, not pumpkin pie filling.
Pumpkin pie filling already contains sugar and spices, so using it would change the recipe.
Step 3: Add the Sugar and Spices
Add to the pumpkin:
- ¾ cup granulated sugar
- ¼ cup brown sugar
- 1½ teaspoons cinnamon
- ½ teaspoon ginger
- ¼ teaspoon nutmeg
- ⅛ teaspoon cloves
- ½ teaspoon salt
Whisk thoroughly.
The brown sugar adds a deeper caramel-like flavor, while the combination of cinnamon, ginger, nutmeg, and cloves gives the pie its classic warm pumpkin-pie taste.
Step 4: Add the Eggs
Add:
- 2 whole eggs
- 1 egg yolk
Whisk gently until incorporated.
Don’t whip the mixture aggressively.
You want a smooth custard, not lots of air bubbles.
Why add an extra egg yolk?
The extra yolk adds richness and helps create a silky, creamy texture without making the pie overly firm.
Step 5: Add the Dairy
Pour in:
- 1 cup evaporated milk
- ½ cup heavy cream
Add:
- 2 tablespoons melted butter
- 1½ teaspoons vanilla
Whisk until everything is completely combined.
The mixture should be smooth and fairly thin, similar to a custard.
Step 6: Strain the Filling
For an especially smooth, bakery-quality pumpkin pie, pour the filling through a fine-mesh strainer into another bowl.
This removes any small pieces of egg or pumpkin and gives the finished pie a beautifully silky texture.
This step is optional but highly recommended.
Step 7: Pour Into the Pie Dish
Pour the pumpkin mixture into the prepared pie dish.
Tap the dish gently against the counter once or twice to release large air bubbles.
If you see bubbles on the surface, pop them with the tip of a toothpick.
Step 8: Bake
Place the pie in the center of the oven.
Bake at 175°C / 350°F for approximately 50–60 minutes.
Start checking around 50 minutes.
The pie is ready when:
- The edges are set.
- The center still has a slight jiggle.
- The surface looks mostly firm.
- A knife inserted about 1 inch from the center comes out mostly clean.
Don’t wait for the center to become completely firm.
The filling continues cooking from residual heat after you remove it from the oven.
If you bake it until the center is completely solid, the finished pie can become dry or develop cracks.
Step 9: Cool Slowly
Remove the pie from the oven.
Place it on a wire rack and allow it to cool at room temperature for approximately 1–2 hours.
As it cools, the custard will continue to set.
Don’t immediately put a very hot pie into the refrigerator.
Once it has cooled significantly, cover it loosely and refrigerate.
Step 10: Chill
For the best texture, refrigerate the pie for at least 2 hours before serving.
Overnight chilling is even better.
The cold temperature allows the pumpkin custard to fully set, making it easier to slice.
Step 11: Serve
Cut the chilled pie into wedges.
Top each slice with a generous spoonful of whipped cream.
For an extra-special finish, add:
- A sprinkle of cinnamon
- Chopped toasted pecans
- A drizzle of caramel
- Freshly grated nutmeg
Serve chilled or let individual slices sit at room temperature for about 15 minutes before serving.
🎃 How to Get the Perfect Texture
The ideal crustless pumpkin pie should be:
Edges: Firm and slightly golden
Center: Soft, creamy and gently set
Texture: Smooth and custard-like
Flavor: Rich pumpkin with warm cinnamon, ginger, nutmeg and cloves
The biggest mistake is overbaking.
A slight wobble in the middle when you remove it from the oven is exactly what you want.
Tips for a Better Pumpkin Pie
Use pure pumpkin purée
Look for a can labeled 100% pumpkin or pure pumpkin.
Don’t accidentally buy pumpkin pie filling.
Use room-temperature eggs
Room-temperature eggs blend more easily with the dairy and pumpkin, resulting in a smoother custard.
Don’t overmix
Whisk just until everything is combined.
Too much air can cause bubbles and an uneven surface.
Don’t skip the salt
Even though you’re making a sweet dessert, salt enhances the pumpkin and spice flavors.
Let it cool completely
The pie will seem softer when it’s hot.
It firms up considerably as it cools.
Make It Extra Spicy
For a more intensely spiced pumpkin pie, use:
- 1½ teaspoons cinnamon
- ¾ teaspoon ginger
- ½ teaspoon nutmeg
- ¼ teaspoon cloves
- A tiny pinch of allspice
You can also add ⅛ teaspoon black pepper for a subtle warmth.
Make It Sweeter
If you prefer a sweeter pie, increase the granulated sugar from ¾ cup to 1 cup.
You can also replace some of the granulated sugar with brown sugar for a deeper caramel flavor.
Make It Less Sweet
For a more pumpkin-forward dessert, reduce the granulated sugar to ½ cup and keep the brown sugar at ¼ cup.
The spices and pumpkin flavor will become more prominent.
Dairy-Free Version
You can make this recipe dairy-free by replacing:
- Butter → melted coconut oil or dairy-free butter
- Evaporated milk → unsweetened canned coconut milk
- Heavy cream → full-fat coconut cream
The coconut adds a subtle flavor that works surprisingly well with pumpkin and warm spices.
Storage
Cover the cooled pie and refrigerate it.
It will keep well for approximately 3–4 days.
Because this is a custard-based dessert, don’t leave it sitting at room temperature for extended periods.
Can You Freeze It?
Yes.
Allow the pie to cool completely.
Wrap it tightly in plastic wrap and then in aluminum foil, or place it in a freezer-safe airtight container.
Freeze for up to approximately 1 month for the best quality.
Thaw it overnight in the refrigerator.
Don’t thaw it on the counter.
🍂 Best Way to Serve It
For a classic fall dessert, serve a slice of chilled crustless pumpkin pie with:
A big spoonful of lightly sweetened whipped cream + a sprinkle of cinnamon + toasted pecans + a small drizzle of caramel sauce.
The creamy pumpkin custard, warm spices, crunchy pecans, and caramel make this a particularly good Thanksgiving or autumn dessert.