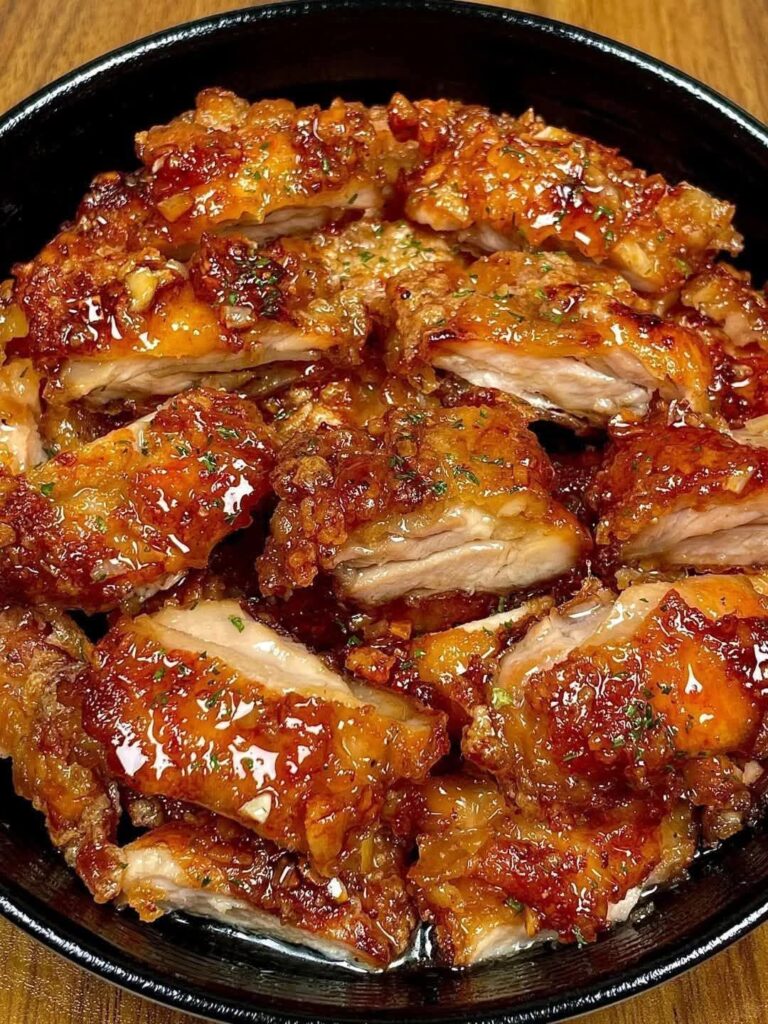

Crispy Honey Garlic Chicken
This version gives you extra-crispy chicken pieces coated in a glossy, sticky honey-garlic sauce. It is perfect with steamed rice and vegetables, and I’ll explain each step so you can get the texture and flavor right.
Ingredients
For the chicken
- 500 g boneless, skinless chicken thighs or chicken breast
- 1 cup all-purpose flour
- ½ cup cornstarch
- 1 teaspoon garlic powder
- 1 teaspoon paprika
- ½ teaspoon black pepper
- 1 teaspoon salt
- 2 eggs
- 2 tablespoons cold water
- Oil, for deep frying
Why use cornstarch?
Cornstarch makes the coating lighter and much crispier than using flour alone. For especially crunchy chicken, the flour-and-cornstarch combination is ideal.
For the honey garlic sauce
- ⅓ cup honey
- ¼ cup soy sauce
- 5–6 cloves garlic, finely minced
- 2 tablespoons butter
- 1 tablespoon rice vinegar or apple cider vinegar
- 1 tablespoon ketchup
- 1 teaspoon grated fresh ginger
- ½ teaspoon red chili flakes, optional
- 2 tablespoons water
For thickening
- 1 tablespoon cornstarch
- 2 tablespoons cold water
Mix these together in a small bowl to make a smooth slurry.
For garnish
- 1 tablespoon sesame seeds
- 2 green onions, thinly sliced
- A little chopped fresh coriander, optional
- Red chili slices, optional
Step 1: Prepare the Chicken
Pat the chicken dry with paper towels. This is important because excess moisture can prevent the coating from becoming properly crispy.
Cut the chicken into approximately 2–3 cm bite-sized pieces.
Chicken thighs are particularly good for this recipe because they stay juicy during frying. Chicken breast can also be used, but avoid cutting it too small because it can dry out.
Place the chicken in a large bowl.
If you want additional flavor inside the chicken, season it with:
- ½ teaspoon salt
- ½ teaspoon black pepper
- ½ teaspoon garlic powder
- ½ teaspoon paprika
Mix well and let it sit for 10–15 minutes.
Step 2: Prepare the Crispy Coating
In a large bowl, combine:
- 1 cup all-purpose flour
- ½ cup cornstarch
- 1 teaspoon garlic powder
- 1 teaspoon paprika
- ½ teaspoon black pepper
- 1 teaspoon salt
Mix everything thoroughly.
In a separate bowl, whisk together:
- 2 eggs
- 2 tablespoons cold water
The cold water helps create a slightly lighter coating.
Step 3: Coat the Chicken
Take a piece of chicken and dip it into the egg mixture.
Make sure it is completely covered.
Then place it into the flour-and-cornstarch mixture.
Press the coating onto the chicken with your fingers. Don’t simply roll it around—pressing the mixture onto the chicken creates a thicker, crunchier crust.
Shake off excess flour and place the coated chicken on a plate or wire rack.
Repeat with all the chicken.
Extra-crispy method
For an even thicker crust:
- Dip chicken in egg.
- Coat in flour mixture.
- Dip it back into the egg.
- Coat it again in the flour mixture.
The second coating creates those crispy, irregular bits that hold onto the honey garlic sauce.
Step 4: Heat the Oil
Pour enough neutral cooking oil into a deep, heavy pan to allow the chicken to move freely.
Good choices include:
- Vegetable oil
- Canola oil
- Sunflower oil
- Peanut oil
Heat the oil to approximately 175°C / 350°F.
If you don’t have a thermometer, drop a tiny amount of the flour mixture into the oil. It should immediately bubble and rise to the surface, but it shouldn’t burn instantly.
Don’t overcrowd the pan.
If you add too much chicken at once, the oil temperature drops and the chicken absorbs oil instead of becoming crispy.
Fry the chicken in several batches.
Step 5: First Fry
Carefully place the coated chicken pieces into the hot oil.
Fry for approximately 4–6 minutes, depending on the size of the pieces.
Turn the chicken occasionally so it cooks evenly.
The outside should become light golden brown and crisp.
Remove the chicken and place it on a wire rack.
A wire rack is preferable to paper towels because it allows air to circulate underneath the chicken, preventing the bottom from becoming soggy.
Step 6: Double-Fry for Maximum Crispiness
This step is optional, but highly recommended.
Let the fried chicken rest for approximately 5 minutes.
Increase the oil temperature to about 185–190°C / 365–375°F.
Return the chicken to the hot oil and fry for another 1–2 minutes.
The coating should become darker golden brown and extremely crispy.
Remove the chicken and drain it on a wire rack.
Why double frying works
During the first fry, the chicken cooks and the coating becomes firm.
During the second fry, excess moisture is driven out of the coating, creating a much crunchier exterior.
This is one of the secrets to restaurant-style crispy chicken.
Step 7: Make the Honey Garlic Sauce
While the chicken is frying, prepare the sauce.
Place a large skillet over medium-low heat.
Add:
- 2 tablespoons butter
Once melted, add:
- 5–6 cloves minced garlic
- 1 teaspoon grated ginger
Cook for approximately 30–45 seconds.
Don’t let the garlic become dark brown. Burnt garlic will make the sauce bitter.
Add:
- ⅓ cup honey
- ¼ cup soy sauce
- 1 tablespoon rice vinegar
- 1 tablespoon ketchup
- ½ teaspoon chili flakes, if using
- 2 tablespoons water
Stir everything together.
Bring the sauce to a gentle simmer.
Step 8: Thicken the Sauce
Mix:
- 1 tablespoon cornstarch
- 2 tablespoons cold water
Stir until completely smooth.
Slowly pour the slurry into the simmering sauce while continuously stirring.
Cook for approximately 1–2 minutes.
The sauce should become:
- Thick
- Glossy
- Sticky
- Smooth
You want it thick enough to coat the chicken rather than run off immediately.
Important
Don’t add dry cornstarch directly into the hot sauce. It will form lumps.
Always dissolve cornstarch in cold water first.
Step 9: Taste the Sauce
Taste the sauce before adding the chicken.
You can adjust it according to your preference.
Too sweet?
Add a little more soy sauce or vinegar.
Too salty?
Add a little more honey and water.
Not garlicky enough?
Add another small clove of freshly minced garlic.
Want it spicy?
Add chili flakes, chili sauce, or finely sliced fresh chili.
Want more tang?
Add another teaspoon of vinegar.
The ideal sauce should taste sweet, savory, garlicky, slightly tangy, and mildly spicy if you choose to add chili.
Step 10: Combine Chicken and Sauce
This is the most important step for maintaining crispiness.
Make sure the sauce is hot and thick.
Add the freshly fried chicken to the skillet.
Turn the heat to low.
Toss the chicken quickly for approximately 30–60 seconds.
Every piece should be coated with the glossy honey garlic sauce.
Don’t leave the chicken sitting in the sauce.
The longer it sits, the more moisture the crispy coating absorbs.
For maximum crunch, you can also put the fried chicken into a large bowl and pour just enough sauce over it to coat the pieces. Toss quickly.
Step 11: Garnish
Transfer the honey garlic chicken to a serving plate.
Immediately sprinkle over:
- Sesame seeds
- Sliced green onions
- Fresh coriander, if desired
- Thinly sliced red chili, if you like heat
The sesame seeds add nuttiness, while the green onions provide freshness and contrast to the sweet sauce.
How to Serve It
The classic way is to serve the chicken over hot steamed rice.
A good plate would be:
Steamed jasmine rice + crispy honey garlic chicken + steamed broccoli + green onions + sesame seeds
You can also serve it with:
- Egg fried rice
- Vegetable fried rice
- Noodles
- Stir-fried vegetables
- Cucumber salad
- Steamed broccoli
- Bok choy
- Asian-style slaw
Important Tips for Perfect Crispy Chicken
1. Keep the chicken pieces similar in size
If some pieces are tiny and others are large, the small pieces can become dry before the large pieces are cooked.
2. Don’t skip the cornstarch
Flour gives structure, while cornstarch gives you that delicate crunch.
3. Don’t overcrowd the oil
Cook in batches. Crowding lowers the oil temperature and results in greasy chicken.
4. Use a wire rack
It keeps the bottom of the chicken crispy.
5. Double fry
If you want seriously crispy chicken, double frying is worth the extra few minutes.
6. Make the sauce separately
Don’t fry the chicken directly in the honey sauce. The sugar will burn and the coating won’t become properly crispy.
7. Sauce the chicken immediately before serving
Honey garlic sauce is naturally moist, so the coating will gradually soften.
8. Don’t overcook the garlic
Garlic should become fragrant, not dark brown.
Make It Spicy 🌶️
For a spicy honey garlic chicken, add one or more of these to the sauce:
- ½–1 teaspoon chili flakes
- 1 tablespoon sriracha
- 1 tablespoon chili garlic sauce
- 1–2 finely sliced fresh red chilies
- ½ teaspoon cayenne pepper
For a sweet-and-spicy version, increase the honey slightly and add chili flakes.
Make It Extra Garlicky 🧄
For strong garlic flavor, use 7–8 cloves of fresh garlic.
Add most of the garlic at the beginning of cooking, but reserve one small minced clove and add it during the final 30 seconds of sauce cooking. This gives you both cooked garlic flavor and fresh garlic aroma.
Make It Less Sweet
Honey garlic chicken is supposed to be sweet, but if you prefer a more savory flavor, reduce the honey to ¼ cup.
Increase the soy sauce slightly and add an extra teaspoon of vinegar.
This produces a more balanced, savory sauce.
Storage and Reheating
For the best texture, eat the chicken immediately.
If you have leftovers, store them in an airtight container in the refrigerator.
The coating will soften because of the sauce.
To bring back some crispiness, reheat the chicken in:
- An air fryer at about 180°C / 350°F
- A hot oven
- A skillet over medium heat
Avoid microwaving if possible because it tends to make the coating soft.
Chef-Style Final Result
The finished chicken should have:
Outside: golden, crunchy and crisp
Inside: juicy and tender
Sauce: thick, glossy and sticky
Flavor: sweet honey + savory soy + aromatic garlic + slight tang
Finish: sesame seeds and fresh green onions
For the best result, double-fry the chicken and sauce it immediately before serving. That combination gives you the signature crispy-on-the-outside, sticky-honey-garlic finish.