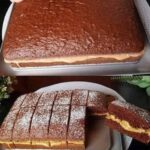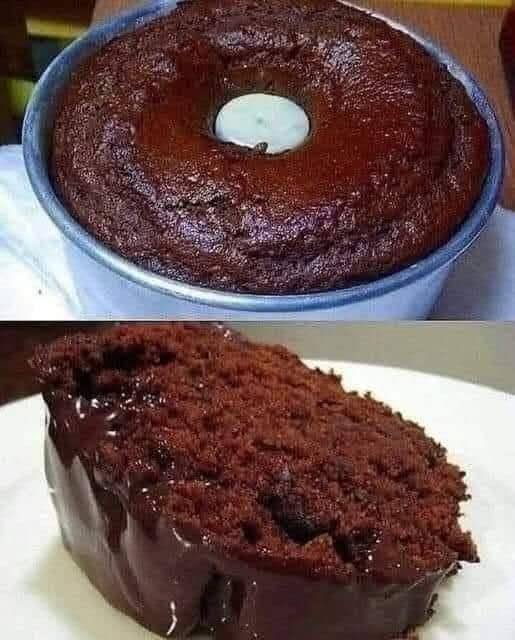

Here is a more complete version of your freshly baked, moist chocolate cake with rich chocolate glaze.
🍫 Freshly Baked Moist Chocolate Cake with Rich Chocolate Glaze
Yield: 10–12 slices
Cake size: 8-inch / 20 cm round cake
Preparation: 30 minutes
Baking: 30–35 minutes
Cooling & glazing: 45–60 minutes
Difficulty: Easy–medium
This cake has a deep chocolate flavor, soft and moist crumb, tender texture, and a thick glossy chocolate glaze. It is excellent as an everyday chocolate cake but also looks elegant enough for birthdays and celebrations.
Ingredients
For the Chocolate Cake
- 1½ cups (190 g) all-purpose flour
- ½ cup (50 g) unsweetened cocoa powder
- 1½ cups (300 g) granulated sugar
- 1½ teaspoons baking powder
- 1 teaspoon baking soda
- ½ teaspoon salt
- 2 large eggs, preferably at room temperature
- ¾ cup (180 ml) whole milk
- ½ cup (120 ml) neutral vegetable oil
- 2 teaspoons vanilla extract
- ¾ cup (180 ml) very hot water or hot brewed coffee
- 2 tablespoons sour cream or plain yogurt, optional but recommended for extra moisture
For the Rich Chocolate Glaze
- 180 g dark chocolate or semi-sweet chocolate
- 180 ml heavy cream
- 30 g unsalted butter
- 1 tablespoon honey, golden syrup, or corn syrup
- 1 teaspoon vanilla extract
- Pinch of salt
Optional Decoration
- Chocolate shavings
- Chocolate curls
- Cocoa powder
- Fresh strawberries
- Fresh raspberries
- Chopped roasted nuts
- Mini chocolate chips
- A small pinch of flaky sea salt
Step 1: Prepare the Oven and Cake Pan
Start by preheating your oven to 175°C / 350°F.
Grease an 8-inch round cake pan thoroughly with butter or vegetable oil.
Place a circle of baking/parchment paper on the bottom of the pan.
Grease the parchment lightly as well.
Dust the sides with a small amount of cocoa powder.
Why cocoa instead of flour?
When you’re making a chocolate cake, cocoa prevents the white flour marks that can sometimes appear around the outside of the finished cake.
If you’re using a springform pan, make sure it closes tightly. Chocolate cake batter is relatively thin and can leak from a poorly sealed pan.
Step 2: Prepare the Dry Ingredients
Place the following into a large mixing bowl:
- flour
- cocoa powder
- baking powder
- baking soda
- salt.
Sift everything together.
This step is important because cocoa powder can contain small lumps.
Sifting also distributes the raising agents throughout the flour, which helps the cake rise evenly.
Add the sugar and whisk the dry ingredients together.
Set the bowl aside.
Step 3: Prepare the Wet Ingredients
In a separate large bowl, crack in the eggs.
Add the sugar mixture from your dry ingredients if you prefer the one-bowl method, or simply whisk the eggs separately first.
Whisk the eggs for about 30–60 seconds.
Add:
- milk
- vegetable oil
- vanilla
- sour cream or yogurt.
Whisk until smooth.
The mixture doesn’t need to become fluffy.
We’re not making a sponge that depends on whipped eggs for its structure. The combination of baking soda and baking powder will help this cake rise.
Step 4: Combine the Batter
Gradually add the dry ingredients to the wet ingredients.
Use a whisk or spatula and mix gently.
Stop mixing as soon as the flour disappears.
Do not beat the batter for several minutes.
Overmixing develops gluten, which can make your chocolate cake heavier and tougher.
At this stage the batter will be fairly thick.
Now comes the important part.
Step 5: Add the Hot Coffee or Water
Prepare ¾ cup / 180 ml hot coffee.
You don’t need an expensive coffee. Ordinary brewed coffee works perfectly.
Slowly pour the hot coffee into the batter while whisking gently.
The batter will become much thinner.
Don’t worry.
A thin chocolate cake batter is normal for this recipe.
The hot liquid helps dissolve and bloom the cocoa powder, producing a deeper chocolate flavor and a softer crumb.
If you don’t want to use coffee, simply use hot water.
You can add the liquid gradually rather than all at once to prevent splashing.
Step 6: Final Batter Check
Your finished batter should be:
- smooth
- glossy
- fairly thin
- free of large flour or cocoa lumps.
Scrape around the bottom of the bowl with a spatula to make sure there isn’t a pocket of dry flour hiding underneath.
Don’t continue mixing once everything is incorporated.
Step 7: Pour Into the Pan
Pour the batter into your prepared cake pan.
Gently tap the pan on the counter once or twice to remove very large air bubbles.
Don’t repeatedly bang the pan because you don’t want to knock out all the air.
Place the cake in the center of the preheated oven.
Step 8: Bake the Chocolate Cake
Bake at 175°C / 350°F for approximately 30–35 minutes.
Start checking around 28 minutes because ovens vary considerably.
The cake is ready when:
- the center has risen;
- the top springs back lightly when touched;
- the edges have started pulling slightly away from the pan;
- a toothpick inserted into the center comes out with a few moist crumbs.
Don’t wait for a completely dry toothpick.
A completely clean toothpick can mean you’ve baked the cake too long.
For a moist chocolate cake, a few moist crumbs are ideal.
Step 9: Cool the Cake Properly
Remove the cake from the oven.
Let it sit in the pan for approximately 10–15 minutes.
Don’t immediately remove it because the cake is still delicate and can break.
After 10–15 minutes, carefully run a thin knife around the edges.
Turn the cake onto a cooling rack.
Remove the parchment paper.
Turn the cake upright.
Allow it to cool completely.
Important
Never pour hot chocolate glaze over a very hot cake if you want a thick, beautiful glaze.
The heat can make the glaze excessively thin and cause it to run completely off the cake.
🍫 Step 10: Prepare the Rich Chocolate Glaze
While the cake cools, prepare your glaze.
Finely chop 180 g chocolate.
Place the chocolate in a heatproof bowl.
Heat 180 ml heavy cream in a small saucepan.
Heat until the cream becomes very hot and begins steaming.
Don’t allow it to boil aggressively.
Pour the hot cream over the chopped chocolate.
Leave it alone for 2–3 minutes.
This allows the heat from the cream to melt the chocolate.
Step 11: Make the Ganache Smooth
Start stirring slowly from the center.
Gradually work outward.
At first it may look like melted chocolate and cream aren’t combining.
Keep stirring gently.
Eventually it will become:
dark → glossy → smooth → silky.
Add:
- 30 g butter
- 1 tablespoon honey or golden syrup
- 1 teaspoon vanilla
- pinch of salt.
Stir until completely smooth.
The butter gives the glaze a beautiful shine.
The honey or syrup helps keep the glaze smooth and gives it a slightly softer texture.
Step 12: Let the Glaze Cool
This is an important stage.
If you pour the glaze immediately while it’s extremely hot, it may be too liquid.
Allow it to cool at room temperature for approximately 10–20 minutes.
Stir occasionally.
You want a consistency similar to thick pouring cream.
It should flow from a spoon but shouldn’t behave like water.
Step 13: Prepare the Cake for Glazing
Place your completely cooled cake on a serving plate or cake board.
If the top has a large dome, carefully level it with a serrated knife.
You can also leave the dome intact for a more homemade appearance.
For a professional finish, place strips of parchment paper underneath the edges of the cake.
These protect your serving plate from chocolate drips.
Step 14: Pour the Chocolate Glaze
Pour the chocolate glaze into the center of the cake.
Using a small offset spatula or the back of a spoon, gently spread it toward the edges.
Don’t press heavily.
Let the glaze naturally flow over the sides.
For a beautiful drip effect, deliberately push a little glaze over the edge in several places.
Then gently spread the remaining glaze around the sides.
Step 15: Decorate
While the glaze is still soft, decorate the cake.
For a simple elegant appearance, use:
- dark chocolate shavings
- chocolate curls
- a light dusting of cocoa powder.
For a birthday cake, you can add:
- chocolate sprinkles
- whipped cream
- strawberries
- chocolate decorations.
For a sophisticated finish, sprinkle just a tiny amount of flaky sea salt over the chocolate.
The salt makes the chocolate taste even richer.
🍓 Optional Strawberry-Chocolate Version
If you want to turn this into a celebration cake, slice the cooled cake horizontally into two layers.
Spread a thin layer of chocolate ganache or whipped chocolate cream between the layers.
Add thinly sliced strawberries.
Place the second cake layer on top.
Then cover the cake with the chocolate glaze.
The combination of dark chocolate + fresh strawberries + moist sponge is excellent.
⭐ How to Make It Even More Moist
There are several ways to make this cake exceptionally moist.
1. Don’t overbake it
This is the most important factor.
Even an excellent recipe will become dry if baked too long.
2. Use oil
Oil remains liquid at room temperature, giving chocolate cake a particularly soft texture.
3. Use hot coffee
Coffee enhances the chocolate flavor without making the finished cake taste strongly of coffee.
4. Add yogurt or sour cream
A small amount adds moisture and tenderness.
5. Use a simple syrup
For an extremely moist celebration cake, brush the cooled layers with a little chocolate syrup before filling.
🍫 Optional Chocolate Syrup
For a very moist layered version, make this syrup.
Ingredients
- ½ cup (120 ml) water
- ¼ cup (50 g) sugar
- 1 tablespoon cocoa powder
- ½ teaspoon vanilla
Method
Add everything to a small saucepan.
Heat over medium heat.
Stir until the sugar completely dissolves.
Simmer for approximately 1–2 minutes.
Remove from heat.
Cool completely.
Brush a small amount over each cake layer.
Don’t soak the cake heavily.
You want moisture—not a soggy cake.
🎂 Turning It Into a Layered Chocolate Cake
For a larger celebration cake, bake two 8-inch cakes.
Allow them to cool completely.
Level the tops.
Cut each cake horizontally if you want four thin layers.
Your assembly can then be:
Chocolate sponge
→ chocolate syrup
→ chocolate cream
→ chocolate sponge
→ chocolate syrup
→ chocolate cream
→ chocolate sponge
→ chocolate syrup
→ chocolate cream
→ chocolate sponge
→ chocolate ganache glaze
Refrigerate the assembled cake before applying the final glaze.
This gives you a much more impressive bakery-style layered chocolate cake.
🧊 Storage
Keep the finished cake covered in the refrigerator.
It is best eaten within approximately 3–4 days.
Before serving, allow it to sit at room temperature for around 20–30 minutes.
This softens the cake and makes the chocolate glaze more silky.
Don’t leave a cream-filled cake sitting at room temperature for extended periods.
🔥 Common Problems and Solutions
Cake is dry
Most likely causes:
- overbaking;
- too much flour;
- oven temperature too high.
Next time, begin checking the cake earlier.
Cake is dense
Possible causes:
- overmixing;
- expired baking soda/baking powder;
- insufficient oven temperature.
Cake sank in the middle
Possible causes:
- opening the oven too early;
- underbaking;
- excessive liquid;
- inaccurate measurements.
Avoid opening the oven during the first 20 minutes of baking.
Glaze is too thin
Let it cool longer.
If it’s still too thin, add a little more melted chocolate.
Glaze is too thick
Warm it very gently or stir in a small amount of warm cream.
Cake breaks when you remove it
It may have been removed from the pan too early, or it may have been slightly underbaked.
Let it cool for 10–15 minutes before turning it out.
👩🍳 Professional Bakery Tips
For the best result every time:
- Weigh flour and cocoa with a kitchen scale whenever possible.
- Use room-temperature eggs and milk.
- Use good-quality cocoa and chocolate.
- Sift cocoa with the flour.
- Don’t overmix.
- Don’t overbake.
- Cool the cake completely before glazing.
- Allow ganache to cool to the correct consistency.
- Refrigerate the cake before making very clean slices.
- Use a hot, dry knife for cutting.
For an especially beautiful presentation, warm a knife under hot water, dry it completely, then make one clean cut through the cake. Wipe the knife and repeat for each slice.