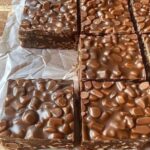

🍪 Freshly Baked Chocolate Chip Cookie BarsYield: 16 thick bars
Pan: 8 × 8-inch (20 × 20 cm) square pan
Prep time: 20 minutes
Chill time: 30–45 minutes
Bake time: 22–28 minutes
Total time: About 1½ hours
Difficulty: Easy
Ingredients
For the cookie bars
- ½ cup (113 g) unsalted butter, melted
- ¾ cup (150 g) light brown sugar, packed
- ¼ cup (50 g) granulated white sugar
- 1 large egg, room temperature
- 1 large egg yolk, room temperature
- 2 teaspoons vanilla extract
- 1½ cups (188 g) all-purpose flour
- ½ teaspoon baking soda
- ½ teaspoon salt
- 1 cup (170 g) semi-sweet chocolate chips
- ½ cup (85 g) milk chocolate chips, optional but highly recommended
For the top
- ¼ cup (40–50 g) extra chocolate chips
- A small pinch of flaky sea salt, optional
1. Prepare the pan
Start by lining an 8 × 8-inch square baking pan with parchment paper.
Leave some parchment hanging over two sides of the pan. These overhanging edges will act as handles, making it much easier to lift the finished cookie bar out after baking.
Lightly grease the parchment with butter or cooking spray.
Why this matters: Cookie bars can stick quite firmly to a metal pan, especially around the corners. Parchment gives you a clean release and makes cutting much easier.
2. Melt the butter
Place ½ cup (113 g) unsalted butter in a small saucepan or microwave-safe bowl.
Melt it gently until completely liquid.
If using the microwave, heat it in short intervals of about 15–20 seconds, stirring between each interval.
You don’t want the butter to be extremely hot when you add the eggs.
Optional—but delicious—upgrade: brown the butter
For a deeper, more caramel-like flavor, brown the butter instead.
Place the butter in a light-colored saucepan over medium heat. Let it melt and continue cooking while stirring or swirling the pan.
The butter will:
- Melt.
- Foam.
- Make crackling sounds as the water evaporates.
- Develop golden-brown milk solids at the bottom.
- Smell nutty and caramel-like.
Once it becomes golden brown and smells intensely nutty, immediately remove it from the heat and transfer it to a bowl.
Let it cool for about 10–15 minutes.
Be careful not to burn it. Brown butter can go from beautifully nutty to burnt surprisingly quickly.
3. Mix the sugars and butter
Add the melted, slightly cooled butter to a large mixing bowl.
Add:
- ¾ cup (150 g) packed brown sugar
- ¼ cup (50 g) granulated sugar
Whisk vigorously for about 1–2 minutes.
The mixture should become smooth and glossy.
You don’t need to whip it like cake batter. Cookie bars don’t require lots of incorporated air.
Why use both sugars?
Brown sugar gives the bars:
- Chewiness
- Moisture
- Caramel flavor
- A softer texture
White sugar helps provide:
- Slight crispness around the edges
- A lighter sweetness
- Better browning
The combination gives you that classic soft-chewy chocolate chip cookie texture.
4. Add the egg and egg yolk
Add:
- 1 large egg
- 1 large egg yolk
- 2 teaspoons vanilla extract
Whisk until everything is completely combined.
The mixture should look smooth, thick and glossy.
Why an extra egg yolk?
The additional yolk is one of the secrets to a really good cookie bar.
Egg yolk contains fat and helps produce a rich, tender and chewy texture without adding as much water as another whole egg would.
That means you get a bar that’s moist and chewy rather than cakey.
5. Combine the dry ingredients
In a separate bowl, whisk together:
- 1½ cups (188 g) all-purpose flour
- ½ teaspoon baking soda
- ½ teaspoon salt
Mix thoroughly so the baking soda and salt are evenly distributed.
This is important because you don’t want one section of your cookie bar to contain a concentrated pocket of baking soda or salt.
6. Add the dry ingredients to the wet mixture
Gradually add the flour mixture to the butter-and-sugar mixture.
Use a rubber spatula or wooden spoon to fold everything together.
Do not overmix.
Stop mixing as soon as you no longer see obvious streaks of dry flour.
The dough should be:
- Thick
- Soft
- Slightly sticky
- Dense
- Easy to press into the pan
Important!
Overmixing develops gluten in the flour.
Too much gluten can turn your cookie bars from:
soft + chewy → tough + bready
So once the flour disappears, stop.
7. Add the chocolate
Fold in:
- 1 cup (170 g) semi-sweet chocolate chips
- ½ cup (85 g) milk chocolate chips, if using
Mix just enough to distribute the chocolate evenly.
For an especially chocolate-loaded cookie bar, you can use a combination of:
- Chocolate chips
- Chocolate chunks
- Chopped chocolate bars
My favorite combination
Use about ⅔ semi-sweet chocolate + ⅓ milk chocolate.
The semi-sweet chocolate provides a deeper chocolate flavor while the milk chocolate melts into sweeter, creamier pockets.
8. Chill the dough
Cover the bowl and refrigerate the dough for 30–45 minutes.
This step is especially helpful because we’re using melted butter.
Chilling:
- Firms the butter
- Prevents excessive spreading
- Improves chewiness
- Intensifies the flavor
- Makes the dough easier to handle
You don’t need to refrigerate it overnight.
For these thick cookie bars, 30–45 minutes is enough.
🔥 9. Preheat the oven
About 15 minutes before baking, preheat your oven to:
350°F (175°C)
For a fan/convection oven, use approximately:
325°F (165°C)
if your oven tends to bake aggressively.
Place the oven rack in the center position.
10. Transfer the dough to the pan
Remove the chilled dough from the refrigerator.
Place it into the parchment-lined pan.
Using a spatula or your fingers, gently press the dough into an even layer.
Try to make the thickness consistent from edge to edge.
Helpful trick
If the dough is sticky, lightly grease your spatula or fingertips.
Don’t add extra flour.
Adding flour at this point can make the bars dry and dense.
11. Add extra chocolate on top
Take your extra ¼ cup of chocolate chips and press them gently into the surface of the dough.
Don’t just scatter them randomly.
Try to place some toward the center and some near the edges so that every finished bar has visible melted chocolate.
For a bakery-style appearance, you can also press a few larger chunks of chocolate into the top.
🍪 12. Bake
Place the pan in the center of the preheated oven.
Bake for approximately 22–28 minutes.
Start checking around the 22-minute mark.
You’re looking for:
- Golden-brown edges
- A lightly golden top
- A center that looks set but still slightly soft
- Chocolate that is melted and glossy
The center should not look like completely raw batter.
However, don’t wait until the entire center looks firm and dry.
Cookie bars continue cooking from residual heat after coming out of the oven.
The biggest secret
Slightly underbaking is better than overbaking.
If you bake them until the entire center looks completely firm, they’ll probably become dry once cooled.
For soft, chewy cookie bars, remove them when the center still has a little softness.
🧂 13. Finish with flaky salt
Immediately after removing the pan from the oven, sprinkle a tiny amount of flaky sea salt over the top.
You don’t need much.
The salt cuts through the sweetness and makes the chocolate taste richer.
If you’re using salted butter, use very little or skip this step.
⏳ 14. Let them cool
This is the difficult part.
Leave the cookie bars in the pan for at least 30–45 minutes.
They will continue to set as they cool.
If you cut them immediately, the center may appear extremely soft and can fall apart.
For clean slices
For the best-looking bars:
- Let them cool completely.
- Lift them out using the parchment handles.
- Place them on a cutting board.
- Use a sharp knife.
- Cut into 16 squares.
For an ultra-clean bakery-style cut, refrigerate the completely cooled slab for 20–30 minutes before slicing.
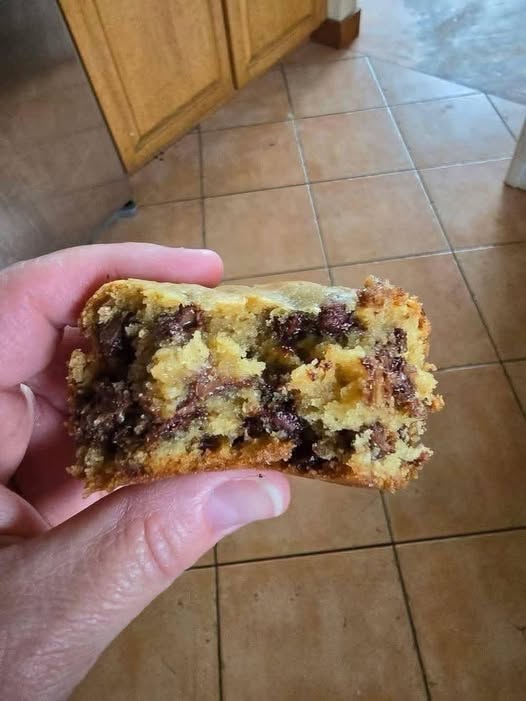
🍫 What the finished cookie bar should be like
When you break one open, you want to see:
Golden, slightly crisp edges → soft chewy interior → melted chocolate pockets throughout.
The middle should be moist and dense without being raw.
The brown sugar provides a caramel-like chewiness, while the extra egg yolk gives the center a rich texture.
⭐ Tips for the best possible cookie bars
1. Don’t pack the flour into the measuring cup
If you’re measuring by volume, spoon the flour into the cup and level it off.
Even better, use a kitchen scale and measure 188 g.
Too much flour is one of the most common reasons cookie bars become dry.
2. Don’t skip the chilling step
Because the butter is melted, the dough can spread too much if you bake it immediately.
Chilling helps maintain that thick, substantial cookie-bar shape.
3. Use good chocolate
Chocolate makes up a significant part of this recipe.
Higher-quality chocolate will noticeably improve the final flavor.
4. Don’t overbake
This is probably the most important tip.
If you’re aiming for soft, chewy bars, take them out when the edges are golden but the center is still slightly soft.
5. Add chocolate after baking too
If you want that dramatic bakery appearance, reserve a few chocolate pieces.
As soon as the bars come out of the oven, gently press the chocolate pieces into the top.
They’ll soften from the residual heat and create beautiful melted chocolate spots.
🔥 If you want them EXTRA gooey
For an especially gooey center, use:
- ¾ cup brown sugar
- ¼ cup white sugar
- 1 whole egg
- 1 egg yolk
- 1½ cups flour
- Plenty of chocolate chunks
Then bake toward the lower end of the baking range, around 22–24 minutes, depending on your oven.
Let them cool before cutting.
The center will remain wonderfully soft and fudgy.
🧊 Storage
Room temperature
Store completely cooled cookie bars in an airtight container for up to 4–5 days.
Place parchment between layers if stacking them.
Refrigerator
They can be refrigerated for about 1 week, although refrigeration will make them firmer.
Allow them to come to room temperature before eating, or warm them briefly.
Freezer
Wrap individual bars tightly in plastic wrap or place them in a freezer-safe container.
They can be frozen for approximately 2–3 months.
To serve, thaw at room temperature.
♨️ How to make them taste freshly baked again
This is my favorite trick.
Take one cookie bar and microwave it for about 10–15 seconds.
The chocolate will become soft and melty again, and the center will become warm and gooey.
Serve it with a scoop of vanilla ice cream for an ultimate warm chocolate chip cookie bar dessert. 🍪🍦
🏆 Quick recipe card
Butter: 113 g
Brown sugar: 150 g
White sugar: 50 g
Egg: 1
Egg yolk: 1
Vanilla: 2 tsp
Flour: 188 g
Baking soda: ½ tsp
Salt: ½ tsp
Chocolate: 255 g total, approximately
Bake: 350°F / 175°C
Time: 22–28 minutes
Pan: 8 × 8 inch
Rest: 30–45 minutes before cutting
The key formula: melted/browned butter + brown sugar + extra yolk + enough chocolate + chilled dough + slightly underbaked center = thick, chewy, freshly baked chocolate chip cookie bars.